The Shift Roster feature in Risper CRM enables organizations to efficiently assign and manage employee work shifts. It provides a structured scheduling system, allowing users to allocate shifts based on employees, departments, and time periods.
Viewing the Shift Roster
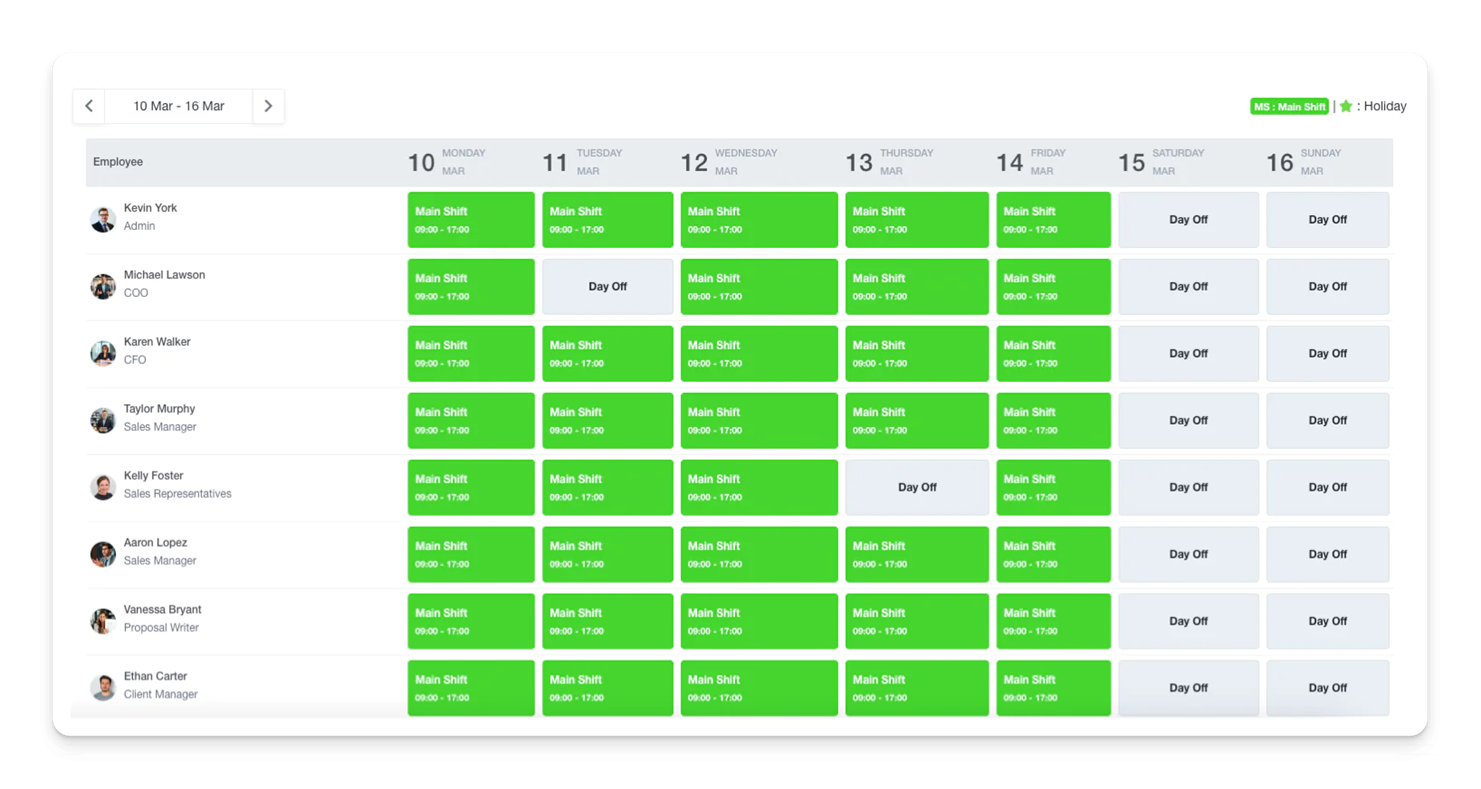
- The shift roster is displayed in a calendar-style format, with employees listed on the left and dates along the top.
- Each cell represents a shift slot for an employee on a specific day.
- Users can switch between different views such as:
- Weekly View – Displays shifts for the current week.
- Department View – Filters shifts based on a specific department.
- Holidays are marked separately to avoid shift conflicts.
Assigning Shifts
Users can assign shifts to employees individually or in bulk:
Bulk Shift Assignment
- Click “Assign Bulk Shifts” to allocate shifts to multiple employees at once.
- Select the Department and choose the employees who need shift assignments.
- Choose a predefined Employee Shift (e.g., General Shift: 09:00 AM – 06:00 PM).
- Define the shift duration by selecting:
- Single Date – Assigns a shift for one day.
- Multiple Dates – Assigns shifts for multiple days.
- Monthly Assignment – Assigns a repeating shift for an entire month.
- (Optional) Enable “Send Email” to notify employees about their assigned shifts.
- Add a Remark or attach a relevant file if needed.
- Click “Save” to finalize the assignment.
Updating an Individual Shift
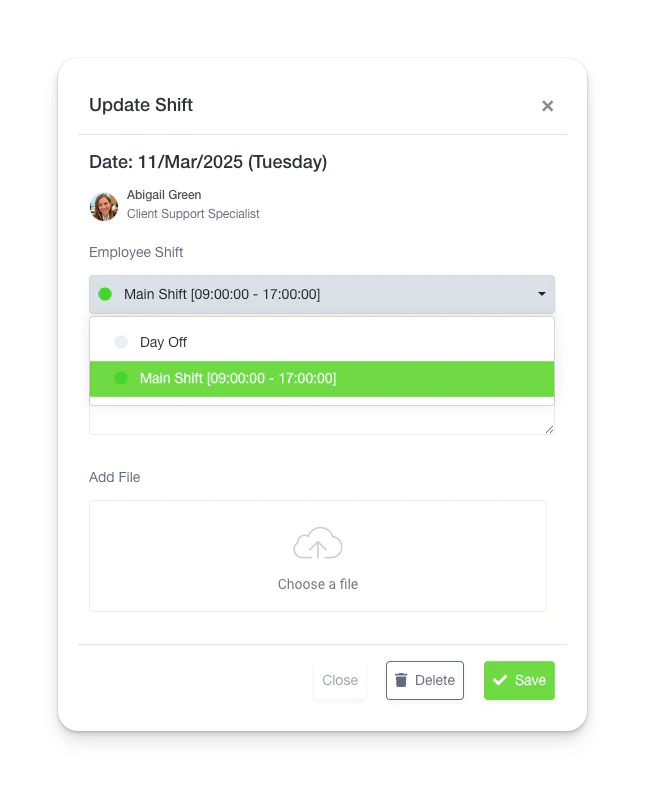
- Clicking on any empty shift box for an employee opens the Update Shift dialog.
- The pop-up displays:
- The selected date and employee name.
- A dropdown to select an Employee Shift.
- A field to add Remarks if necessary.
- An option to attach a supporting File.
- Click Save to confirm changes, or Close to cancel without saving.
- If an existing shift is already assigned, selecting a new shift will override the previous one.
Exporting Shift Data
- Click “Export” to download the shift roster in an Excel file for record-keeping and reporting.
Designation
Designation Table View
The Designation module allows organizations to manage job titles and their hierarchical relationships. This feature ensures clear role definitions within the company.
Designations Hierarchy View
Key Features
- Add New Designations: Create new job titles and assign them to relevant departments.
- Parent Designation: Define hierarchical relationships between roles.
- View & Manage: Easily update, remove, or restructure designations.
- Export Designations: Download a list of designations for reference or reporting.
Designation Both Views
Adding a Designation
- Click “Add Designation”.
- Enter the designation name.
- Select a parent designation if applicable (e.g., “CEO” under “Executive Leadership”).
- Click Save to finalize.
This module ensures a structured organizational framework, simplifying role management across departments.