The Projects feature under Project Management in Risper CRM allows users to effectively organize, manage, and track projects. It provides a comprehensive view of all projects, their progress, and relevant details, ensuring streamlined project management.
Viewing Projects
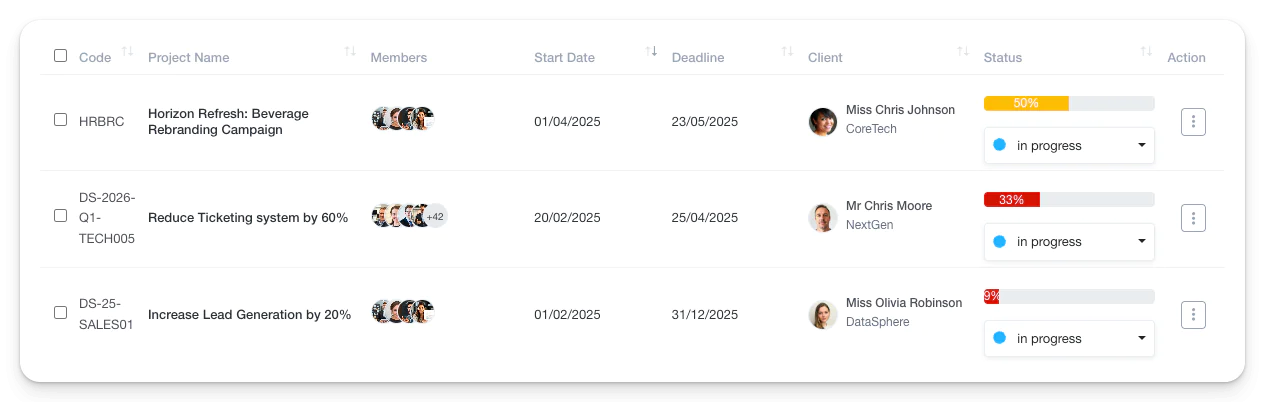
- Navigate to Project Management > Projects to see a list of all ongoing and completed projects.
- The project list displays essential details such as:
- Code: Unique identifier for each project.
- Project Name: Title of the project.
- Members: Team members assigned to the project.
- Start Date: When the project commenced.
- Deadline: Expected completion date.
- Client: The client associated with the project.
- Status: Current status (e.g., In Progress, Completed).
- Users can filter projects by:
- Duration: Start Date to End Date.
- Status: In Progress, Completed, etc.
- Progress: Percentage of project completion.
- Client and Contract Type: Narrow down projects related to specific clients or contract types.
- The view can be customized using different display options, including List View and Grid View.
Adding a New Project
- Click “Add Project” at the top of the project list to create a new project.
- Fill in Project Details:
- Short Code: Unique identifier for the project.
- Project Name: Name of the project.
- Start Date and Deadline: Timeline of the project.
- Project Category: Select or add a new category for better organization.
- Department: Assign the project to a specific department.
- Client: Link the project to an existing client.
- Project Summary and Notes: Detailed description and additional notes.
- Configure Additional Settings:
- Public Gantt Chart: Enable or disable visibility of the project timeline.
- Public Task Board: Allow team members to track tasks visually.
- Task Approval: Specify if tasks require approval by Admin or Project Admin.
- Add Project Members:
- Select team members who will be part of the project.
- This ensures only relevant personnel have access to project details and tasks.
- Other Details:
- Click on Other Details to add additional information as required.